| LEARN
MDS STEP BY STEP |
| STEP NO. 2 |
 |
 |
When Program starts, the above graphics is
displayed. The Menu bar contains following options.
I. File
II. Add Record
III. Display_Print_Delete
IV. Edit Record
V. Read Me
VI. Exit
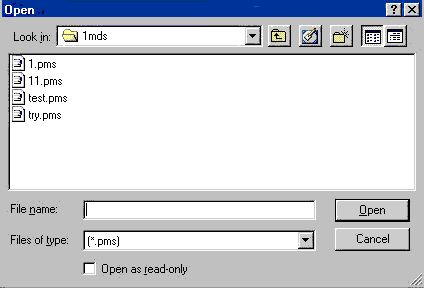
Click the Add Record option in the MENU bar. The following window will open. |
 |
 |
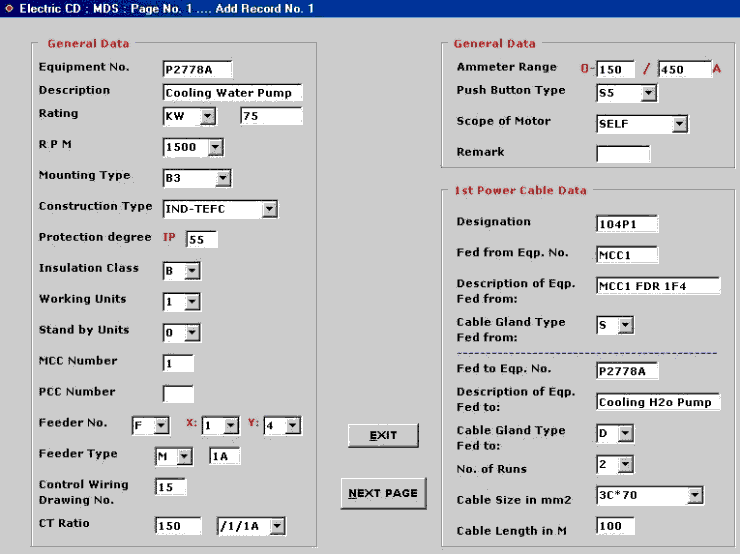
Now click " 1 " file & click open. A new window
will appear as follows. The heading is Page No. 1.
Add Record No. 1. Note that total data consists of 3 pages. |
 |
 |
Enter General Data and 1st Power Cable Data
for the 1st Page. I have added a typical sets of Data for reference. A user
can change the above parameters as per the project requirements. Once the data
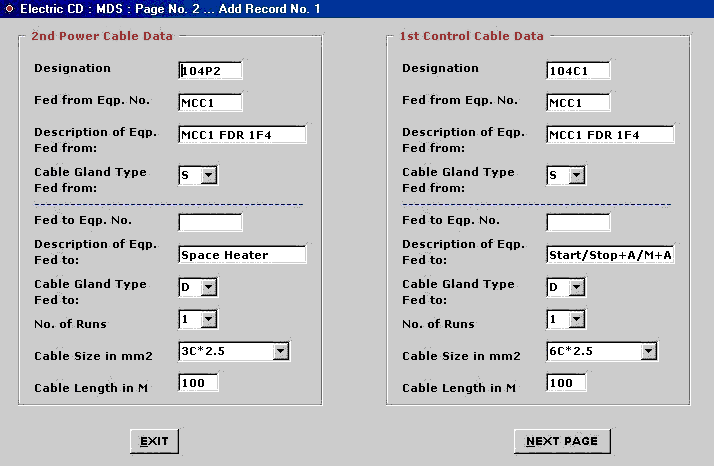
feeding is over, click " NEXT_PAGE " button. New screen is displayed
as follows. |
 |
 |
Now enter 2nd Power Cable and 2nd Control
Cable Data for the 2nd Page. I have added a typical sets of Data for
reference. A user can change the above parameters as per the project
requirements. Once the data feeding is over, click " NEXT_PAGE "
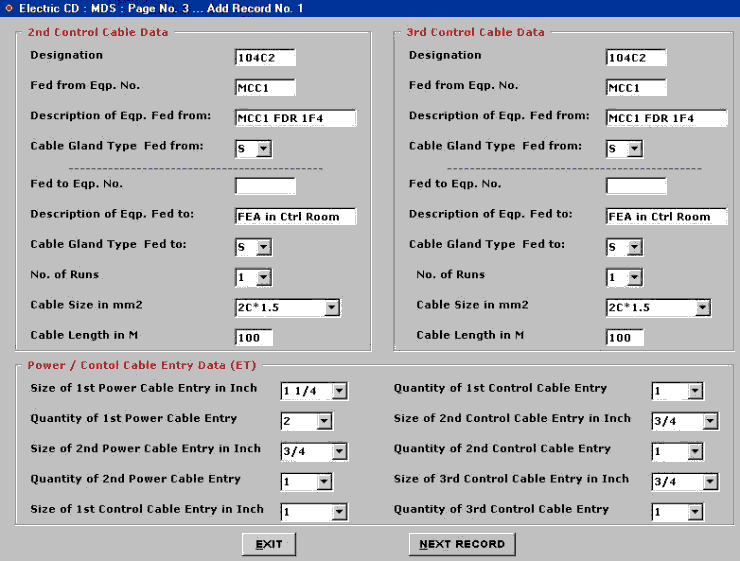
button. New screen is displayed as follows. |
 |
 |
Now enter 2nd, 3rd Control Cable Data and
Power / Control cable Entry (ET) data for the 3rd (Last) Page. I have added a
typical sets of Data for reference. A user can change the above parameters as
per the project requirements. Once the data feeding is over, click " EXIT
" button OR " NEXT RECORD " button to continue with adding more
records. |
| STEP NO. 2 IS OVER. |


|