| LEARN
MDS STEP BY STEP |
| STEP NO. 1 |
 |
 |
When Program starts, the above graphics is displayed. The Menu bar contains following options.
I. File
II. Add Record
III. Display_Print_Delete
IV. Edit Record
V. Read Me
VI. Exit
Click the FILE option in the MENU bar. The following window will open. |
 |
 |
Now click "Make New File" option. The following window will open. |
 |
 |
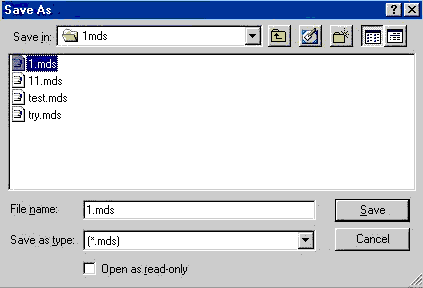
You must create a separate Folder / Directory to store your files.
I have created a Directory called
" 1mds " in C drive to store my " MDS " files.
Now go to this folder & give a file name to your project. I have given "
1 " as the name of my new project file. Click the save button.
When you click the save button, following window will open. |
 |
 |
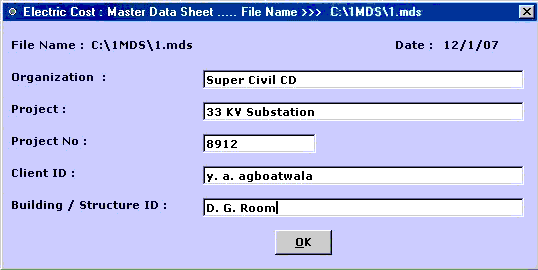
The window requires various project details. Whatever values you will fill here will serve as default values for the project.
I have filled up the above values as required by my new project
" 1 ".
You can change these values now OR later by clicking "Edit Project File" option in File Menu. Now click the OK button, following window will appear. |
 |
 |
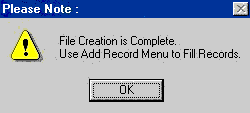
Click OK button. Now project File creation is complete.
The above window gives the following vital information.
Use Add Record Menu to add Quantities of various Items.
Click " OK " button, you are back to the Main Menu. |
| STEP NO.
" 1 " IS OVER. |


|